BTW- after a COUPLE WEEKS, back country binders got my replacement front brake hoses to me- they seem to be of good quality and are DOT approved. Even though it was "cheap" pricewise compared to some other dealers parts
I don't know how they justify the $18.75 shipping cost for something thats 1 pound from Washington state to Texas...
OK- off my soap box....
 |
This is in the rear end- fine for going straight, but for steering in the front its
generally regarded as horrible. |
 |
| Thats why I got this- an Aussie locker- made in the USA |
 |
The instuctions note that if you have a thick ring gear- you will have to remove the carrier.
On my '92 Cherokee with the 8-1/4" rear axle and stock gearing the cross pin came right out past
the ring gear with no problems and everything was done in place- not so with a front end dana 44 and 4.56 gears.
Jack up the vehicle on a flat surface, chock the back wheels, and put the front axle on jack stands.
My faithful 2 ton jack turned unfaithful the other day so don't trust them.
Start pulling the tires, brake calipers, locking hubs (yes, its old), hubs, caliper bracket and spindle. Then
just simply pull the axleshaft out a couple inches. There's half an hour you'll never reclaim.
Mark the bearing caps so they go back in the same direction, grab a 3/4" drive and cheater bar then
get after the bolts. A pry bar was utilized to get the carrier to pop out. |
 |
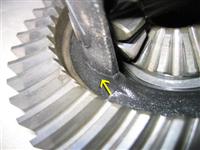
| Here- the ring gear was removed already- the cross (drive) pin has a rolled pin that keeps it in place. I found the proper sized drill bit and a nylon dead blow and tapped it out. The pin came out pretty easily. |
 |
To get out the spider gears rotate the gears and remove the smaller ones. They have a curved thrust washer under
each gear that needs to be removed also. One washer came out stuck to the gear- one stayed. |
 |
Note the side rib reinforecment the scout carrier has... BEEFY! Compare this
to the pics on the early bronco site of that carrier below.
|
 |
This is the carrier off the early bronco
site showing the crack he has
in the carrier, no rib reinforcement... |
 |
Heres the locker installed with pins and springs- I didn't dare try to put in the springs and hold the camera at the
same time! The Aussie requires you to get a clearance between the side cups and pin and then after installing
a clearance between the 2 inner gears that the cross pin goes through. With the new , non warped, washer
and pin, everything was dead perfect. |
 |
The cross pin went in easily, the roll pin was a bit of a pain, but went in.
|
Re-assembly:
Re install ring gear & torque bolts.
Put carrier back into pumkin, torque carrier bearing bolts to spec
Put axles back in, reinstall and grease spindles, brakes, locking hubs
Put on tires and do the final Aussie locker test.
I put on a THICK differential cover to protect my investment (2X as thick as stock)
Fill with gear oil
Enjoy having an actual 4WD!
http://classicbroncos.com/aussie_locker.shtml


